TECH TOOLS WITH A PURPOSE
As I get ready to finish my first year as the Instructional Technology Specialist at Burlington High School, I can’t help but reflect on one of the very first technology tools I promoted and shared with my colleagues. That tool was Movenote. What excited me about Movenote was that it was free, very ease to learn, device agnostic, and could be integrated into virtually any content area and grade level. I also viewed Movenote as the perfect tool to use for flipping lessons. I knew my colleagues agreed with me when word quickly spread about Movenote throughout Burlington and many teachers and students started using it. I authored a very brief post about it back in October (it was the first app review of the year) featuring a video tutorial and sample Movenotes several of our Spanish students had created. It has been rewarding to see so many of my colleagues, as well as students, integrate the tool I had suggested into their curriculum, so you can imagine my disappointment when I discovered the Movenote iPad app was no longer free. Fortunately, it is once again available at no cost! If you have yet to try Movenote with your students, it is a must-add to your toolkit for next year. Our teachers here in Burlington have had a great deal of success with it and several have adopted it as somewhat of a foundational tool. So as we prepare to leave for the summer, I thought it was fitting to come “full circle” and wanted to share how one of our Science teachers has used Movenote over the course of this year and the meaningful impact it has had on her students and their learning.
MOVENOTE IN ACTION
I was recently working with Brianna Allison, a Burlington Environmental Science and Biology teacher, on Discovery Education and our conversation led to how she has integrated Movenote into her curriculum. Specifically, Brianna has created flipped review sessions for her students using Movenote and has experienced tremendous success. After conducting two simple tests with the tool, which included practicing looking at the camera versus the video window that appears on the screen, she was ready to “go live” and create her first Movenote video lesson. As you can see in the Movenote she created here, she uses the “laser pointer” feature to add emphasis on her slides. Beyond being able to use the laser, there are several other features Brianna likes about Movenote. First and foremost, she can easily stop recording if she needs to and then can continue on seamlessly. During one of her lessons, the bell had rung and an announcement was made over the PA system. Brianna simply paused the video and when the announcement was over, she was able to finish the recording. Secondly, Brianna likes being able to stop the recording in the video for instructional purposes. She had pulled in one slide that contained questions that were similar to the types of questions that would appear on the exam. In the lesson Brianna told her students to pause the video and try answering the questions. In the very next slide, when the students unpaused the video, Brianna provided her students with answers to each question (see her answers in red in the second screenshot below). Beyond that, Brianna was able to show her students the step-by-step procedure to solve each problem through the Movenote video.

Ms. Allison instructs her students to pause the Movenote and attempt to solve the problems
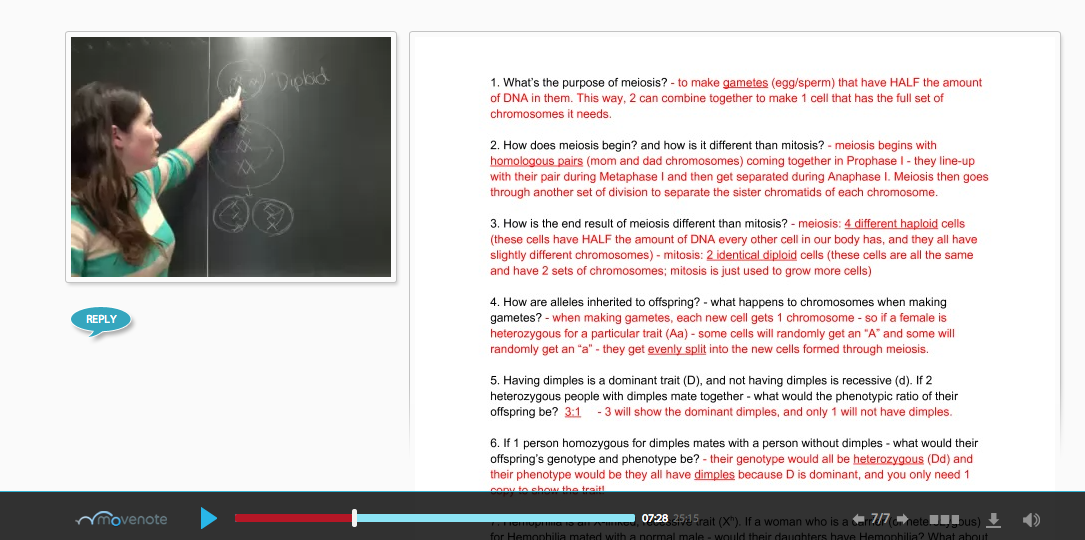
Ms. Allison walks her students through the problem-solving process through the Movenote video lesson
A third reason Ms. Allison likes Movenote is because it keeps an archive of every video she has created and she can see how many times it has been viewed. Brianna has 40 students and while some of the videos have fewer than 40 views, she informed me that her students would get together after school and watch them as a group. Other students would watch the same video several times to gain full understanding of the material. All students were able to personalize their learning experience by being able to pause, rewind, and watch the videos as often as necessary.
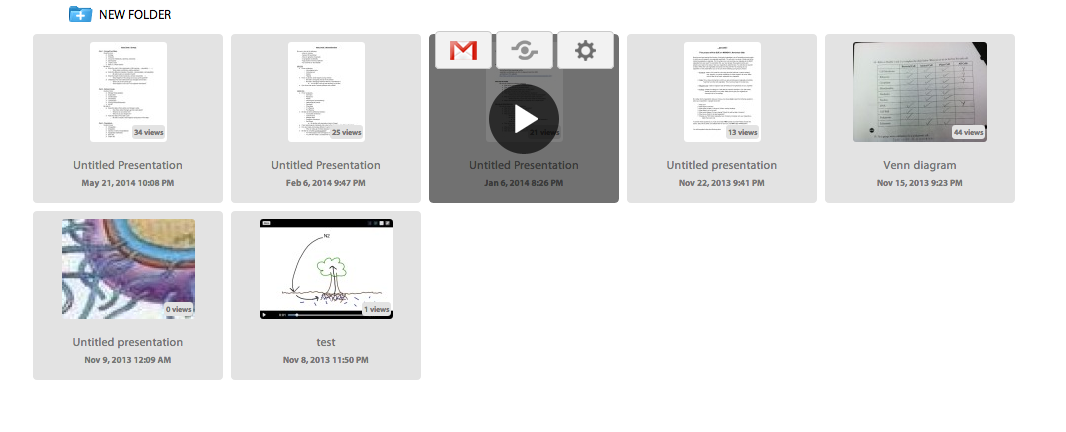
Archive view of the Movenotes Ms. Allison created for her students
WHAT THE STUDENTS THINK
With a big smile on her face, the first thing Brianna told me about her students’ impressions of Movenote was that they wanted her to do one for everything! In fact, there was a student in the room when we were talking and she chimed in to share that the Movenote videos were “wicked helpful” to them as they prepared for major exams. Students appreciated the feedback and extra practice the videos provided and as a result their grades increased. After each Movenote she produced, Brianna’s students would encourage her by saying she was “getting better at them.” If you’ve never done it before, the first time a teacher ventures into the world of flipping and creating the videos him or herself instead of just using an existing video, it can be a bit awkward. Brianna shared that she had to get used to talking to her computer in front of an empty classroom. However, she is definitely more comfortable creating these valuable lessons for her students and the work she is doing with her students is impressive. I am hoping she will take me up on my offer to co-present a workshop in the fall on how to use Movenote in the flipped classroom! Again, if you haven’t explored Movenote yet, take the time this summer to create your own flipped video lessons on your computer or iPad. You can also check out the Movenote for Gmail Chrome Extension.


