Better Safe Than Sorry: How to Backup Your iPad Before You Upgrade to iOS 7
For those of you who still haven’t installed iOS 7, senior Help Desk bloggers Marko and Shams provide detailed step-by-step instructions on how to backup your iPad before installation.

Sham
Class of 2014

Marko
Class of 2014
Via Cable and a Computer (scroll down for the iCloud version):
In today’s rapidly advancing technological world, sometimes amazing things such as a simple USB cable are taken for granted. However, that single cable is enough to save you a whole lot of worry if your iDevice ever malfunctions. Backing up your data is crucial in order to restore your iPad to its original condition, prior to encountering any hard/software issues, or simply after updating your iPad to the newest iOS. It’s suggested to backup your iDevice each time you make a purchase on the App Store, or every time something important is imported onto your iDevice. This tutorial will show you how to backup your iDevice using your personal computer, a USB cable, your iDevice, and iTunes.

- The Cable Method
Step 1: If you have not already, download iTunes here, then follow the setup instructions.
Step 2: Register for an Apple ID, or use an existing one if you have it.
Step 3: Once installed, open iTunes. It should look a little something like this:

- iTunes Store main screen

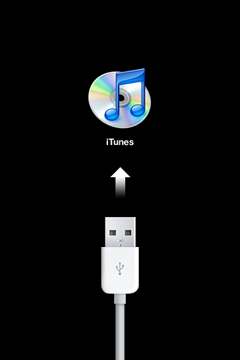
Step 4: Now, take your iDevice and your Apple-provided USB cable.
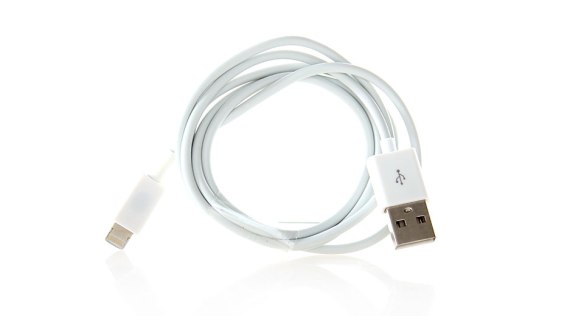
- The Cable
Plug the cable into your computer and iDevice, placing the properly fitting ends into their respective slots.

- iTunes syncs the iDevice after it is plugged in
Step 5: Once you plug the iDevice in, iTunes should recognize it and start syncing it to your computer.
Step 6: After the synchronization is done, in the top right corner of your library should be a button labeled iDevice (Device will be replaced by whatever your device is, in this case I used an iPod).

- iDevice button

Step 7: Click on the button (don’t hit the eject button (the triangle with a line under it.)). It will lead you to a screen that looks like this:

- iDevice status screen

Step 8: Under the Backups section, choose “This computer” under Automatically Back Up, as it is selected in the picture. This will backup your iDevice to that computer each time you connect it to that computer via USB cable.
Step 9: Now, look to the right of the screen, at the “Manually Back Up and Restore” section. Choose “Back Up Now” to ensure that everything on your iDevice gets backed up. Once you click that button, the backup process will start and you will see this at the top of the screen:

- Finally! The moment we’ve been waiting for!
Congratulations! You have successfully backed up your iDevice and are ready to upgrade to the new iOS and enjoy all the wonderful new features it has to offer!
Via iCloud:
If you’re like me and have a horribly slow computer, the ol’ “plug in” technique can quickly become a nightmare. Or, if you’re crunched for time and need to do a quick backup/restore of your iDevice, the USB system just won’t cut it. Fortunately for people like us, Apple “came in clutch” with the introduction of the iCloud software with their previous release of iOS 5. iCloud serves as a “virtual space server,” one that doesn’t physically exist, but is still there working tirelessly in the background to save all of your precious information. If that definition is too complicated, simply think of it working like magic.

- iCloud

How exactly does an iCloud backup work? Or better yet, how do you go about backing up your iDevice using it? You’ll be surprised to know that it’s actually VERY easy! Just follow these simple steps, and you’ll be all set!
Step 1- You’re gonna need an Apple ID to get started. If you don’t have one, scroll up the page a bit to Marko’s section and read his instructions on how to make one. If you already have one, then you’re ahead of the game. Skip to Step 2.
Step 2- Once you have your Apple ID all set, click the “Settings” App.
Step 3- Look for the iCloud tab, and click on it. From this menu, you can choose exactly what you want to backup, whether it’s your Safari bookmarks or your precious photos. If you’re looking to save your Mail contacts and Notes, please go here, as you’ll need a special .me email account (the link will explain everything, don’t worry).

- iCloud tab under Settings

Step 4- After finalizing what you want to backup, go ahead and hit the “Storage & Backup” button. This screen should pop up:

- Storage & Backup screen

Step 5- Some more settings to tinker around with here. “Change Storage Plan” allows you to upgrade your storage from the initial (and free) 5GB to more (with a yearly fee of course). Tapping “Manage Storage” allows you to free up space by getting rid of old backups. Finally, the “iCloud Backup” button with the “on/off slider” is a tool you should REALLY consider utilizing. Like the little description under it says, this tool backs up your iDevice when your device is “plugged in (charging), locked, and connected to Wi-Fi.” This is honestly my favorite part of using iCloud, as it pretty much makes the whole backup process effortless.
Step 6- Once you’re all set playing with the settings, go ahead and hit “Back Up Now.” This should usually take several a couple minutes to complete, but may take longer depending on the amount of software (games, music, notes, etc.) on your iDevice.
CONGRATULATIONS! You’ve successfully backed up your iDevice using iCloud! You are now ready to install iOS 7!
Images Used:


