I’m proud to introduce Senior Blogger Dora Kadish, our resident Evernote genius. In this post, she shares some practical tips on how to use Quick Notes in Evernote.

Dora Kadish
Class of 2014
7 Sure Is The Magic Number…
I am sure you all are eager to have the newest versions of everything. And, luckily for you compulsive note-takers, Evernote is now even cooler!
HOW TO MAKE A QUICK NOTE:
In order to make a quick note:
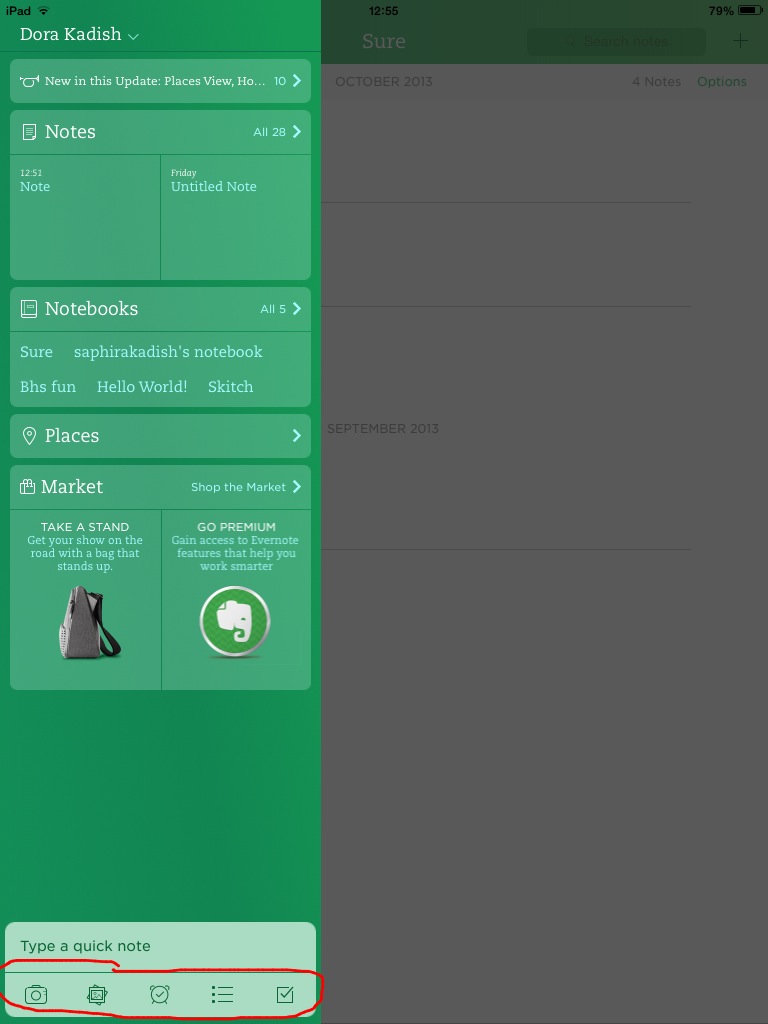
Step 1: Go to the homepage of the app and look down towards the bottom.
Click on “Type a quick note.” There are five types of Quick Notes you can choose from, including taking a picture, importing a photo, creating a reminder, creating a bullet point list, and creating a checklist. Creating Quick Notes is extremely simple, but we have provided step-by-step instructions for each type of Quick Note in case you need it.
To Take A Picture:
- Click on the first button under “Type a Quick Note”

- You can choose to either take photo via the camera, or the Document Camera
- You can reach the Document Camera by swiping to the left
- The Document Camera is for taking pictures of documents
To Retrieve A Photo:
- Click on the second button under “Type a Quick Note”
- Click “Allow” in order to retrieve photos
- Now you can access your photos and insert them into your notes
To Create a Notification
- Click on the third button under “Type a Quick Note”
- Type whatever message you wish to be reminded of
- Click “Notify Me”
- A calendar will appear allowing you to specify the date and time of the reminder
To Create a Bulleted List
- Click on the fourth button under “Type a Quick Note”
- Write out whatever you wish
- To create a second bullet, or third, etc, hit “enter”
To create a Checklist
- Click on the fifth button under “Type a Quick Note”
- Type out whatever message you wish to
- In order to create a second check, hit “enter”
To Create a Quick Note
- Click on “Type a Quick Note” at the bottom of your screen
- If you want to add some flair to your Quick Note, you can insert a picture or an audio file.
- Click on the paper clip symbol in the top right hand corner – four options will appear.
- You can take a picture right then and there (camera)
- To retrieve an old photo, go to Saved photos.
- To insert an Audio post, click Audio.
- Click “more…” under your title
- You can choose to add a tag and add your location within the post.
Now onto the actual point of this post: why should teachers and students use this Evernote app?
For Students:
My answer: it’s easy, convenient, and free. You can sort through all your notes and documents, and write reminders, which is a better strategy than writing your to-do list on your hand.

You could even go as far as creating individual notebooks for each class and take advantage of tags. This app will help you stay organized and will keep you ahead of your peers and classmates, preparing you for the next phase of life…college or the workforce.
For Teachers:
If you’re not using Evernote, you should be. Take my Help Desk teacher, for instance, Ms. Scheffer. She has over 30 notebooks and multiple tags. She finds a lot of resources for her classes through Twitter, Google+, and educational blogs. She’s a huge fan of Evernote’s Webclipper which automatically pushes what she finds on the web into her specified notebook. She also takes advantage of tags to stay extra organized. She often does this from her iPhone, allowing her to live her “fabulous, carefree lifestyle on the go!” (Her words, not mine).
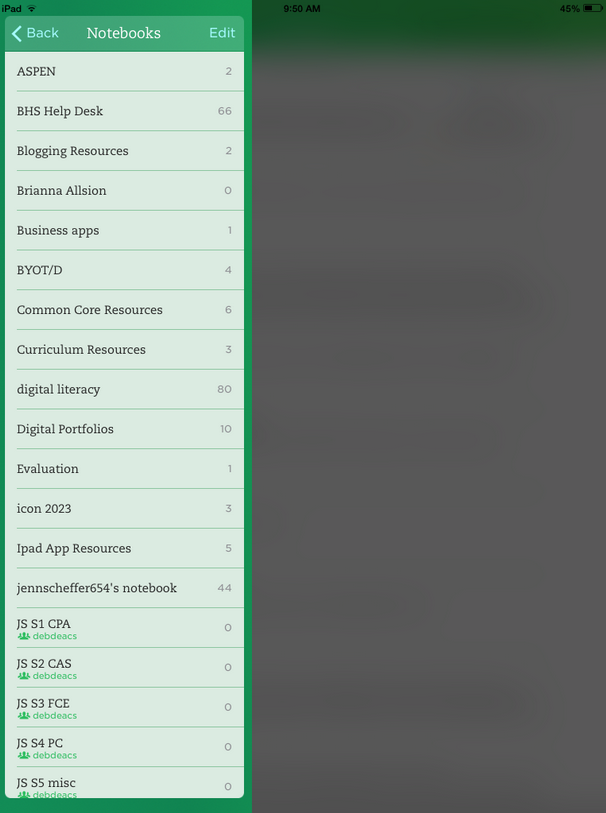
Ms. Scheffer’s Evernote notebooks

Ms. Scheffer’s Evernote tags
For More Information:
Click here for a video on Evernote notes, and here for an informational blog about all your Evernote needs.
(Picture credit to: blog.evernote.com)
