
Junior Nathan Rippin
Click on the image to visit Nathan’s blog
Ever found presentations, projects, or pictures bland and unappealing? As a student, I have found a way to make my images pop and convey the information that is needed.
The Need:
Students in today’s day and age crave information. But beyond that, they want to be engaged. Students are always asking themselves, “what’s next and why does this matter?” For many students, textbooks have text and images and that’s it. The picture is just a picture, there is nothing that brings the photo to life. Bottom line, textbooks lack interactivity. However, by incorporating technology, students can become more engaged in the lesson and excited about presenting their learning.
The Solution:

With Thinglink, students can tag photos, add external links to other websites, videos, and social networking sites. This allows students to dive into the subject with multimedia enhancements and make photos become interactive. Thinglink allows expression and innovation within presentations and gives students a way to make their projects pop. Thinglink is available on the web and on the iPad. Images can be uploaded from your computer, Facebook, or Flickr. Here’s an example ThingLink created about Burlington Public Schools.
Follow this step-by-step tutorial and you’ll be able to create your own ThingLink in no time!
Step One:
Go to ThingLink’s website (or download the free iOS app onto your iPad)

Step Two:
Click on the upper right hand corner “Join Now.” You can use an existing Facebook or Twitter account if you choose instead of creating a new account.

Step Three:
Enter your desired information for your new account and be ready to create new and exciting images.

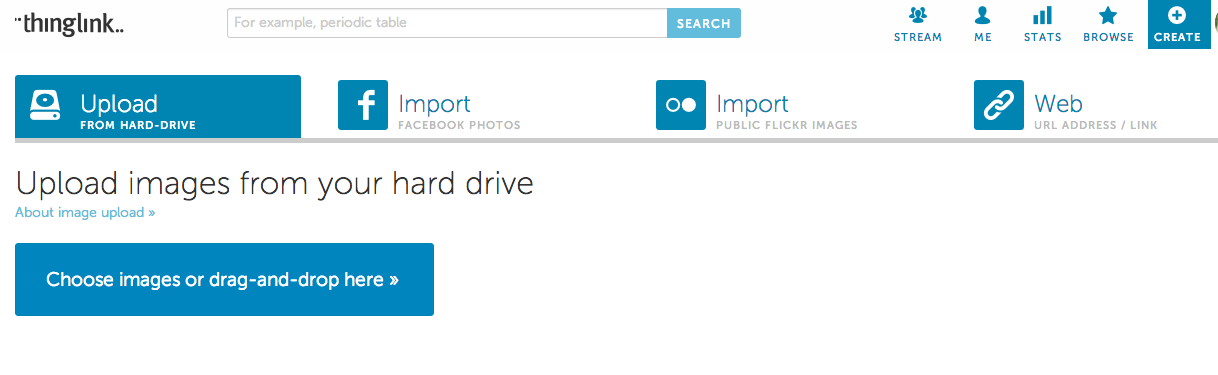
Step 4:
Click “create” in the upper right corner. Next you can choose an image from your computer, Facebook, public Flickr photos, or from the web. The screencast below demonstrates just how simple it is to make images interactive using ThingLink.
Here are Some Examples:
Below is a screencast on how to create a ThingLink using the iPad:

Sounds awesome, thanks for sharing, Nathan.